Instrukcja Grässlin Thermio 402 Termostat

Potrzebujesz instrukcji dla swojego Grässlin Thermio 402 Termostat? Poniżej możesz bezpłatnie obejrzeć i pobrać instrukcję w formacie PDF w języku polskim. Ten produkt ma obecnie zadane 2 pytania, 0 komentarzy i 0 głosów. Jeśli nie jest to podręcznik, którego szukasz, skontaktuj się z nami.

Czy Twój produkt nie działa, a w instrukcji obsługi brakuje rozwiązania Twojego problemu? Udaj się do Repair Café, gdzie naprawisz swój sprzęt za darmo.
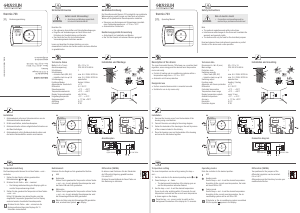
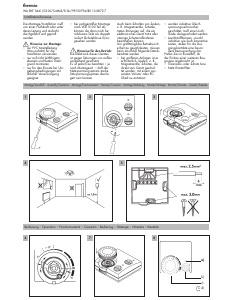
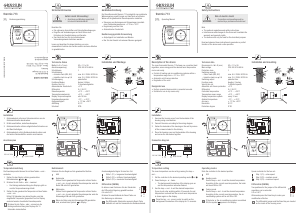
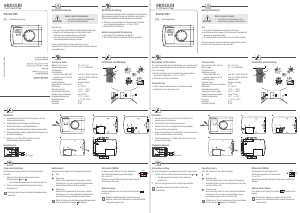
Instrukcja

Loading…

1
2
3
4
Assembly/Installation
GB
Lift the adjusting knob with a suitable tool
Release the fastening screw
Remove the upper part of the case
Determine the appropriate type of installation
5
The unit must be connected by a qualified person exercising
due care
Switch off the heating system before assembly
Check and make sure that the connecting wires are not
live
Guide the connecting wires through the opening in the unit’s base
Mount the base on a flat, firm surface or flush-mounted socket
Strip the connection wires properly and connect as shown in
the circuit diagram, see the circuit diagrams on the following
pages
Accuracy of control is only achieved if the stated current
values are adhered to.
Do you know how much current is drawn by the consumer?
If in doubt, check!
Select the right type of connection terminals when making the
connection!
6
7
8
Connection/Operation
GB
Technical data
GB
Determine the temperature range
thermio 102
a)
b)
c)
d)
thermio 402 thermio 103 thermio 403 thermio 513
––
Connect terminal 3 Connect terminal 3
LED OFF =
Comfort temperature
LED ON =
Lower temperature
––
Set temperature value
Connection of a time switch
2 =
Comfort temperature
1 =
Lower temperature
1=
Heating ON
0=
Heating OFF
1=
Heating ON
0=
Heating OFF
Put the setting knob on the shaf. Note the markings!
thermio 102
75 x 71 x 21
2-wire
approx. 200 mW
0,5/5 A/250 V~
0,5/4 A/250 V~
0,5/1 A/24 V–
Opens (with increasing temperature)
Ag Ni
T 30
II after suitable installation
Surface mounting
Screw terminal with wire fuse
+5 °C to +30 °C
approx. 1 K
Thermal
-20 °C to +70 °C
IP 20
as per EN 55014
Dimensions H x W x D mm
Weight g (approx.)
Connection
Power consumption
Switching capacity
- with ohmic load
-
with inductive load cos. ϕ 0,6
- minimum
Switching output
Switching contact
Ambient temperature
Protection class
Switching status indication
- thermostat
- selector switch
Type of installation
Type of connection
Day temperature regulation range
Overnight temperature drop
Temperature switching differential
Feedback
Storage temperature
Type of protection
Radio interference suppression
thermio 402
75 x 71 x 21
2-wire
approx. 200 mW
0,5/5 A/250 V~
0,5/4 A/250 V~
0,5/1 A/24 V–
Opens (with increasing temperature)
Ag Ni
T 30
II after suitable installation
yes
Heating On/Off
Surface mounting
Screw terminal with wire fuse
+5 °C to +30 °C
approx. 1 K
Thermal
-20 °C to +70 °C
IP 20
as per EN 55014
thermio 103
75 x 71 x 21
3-wire
approx. 200 mW
10 A/250 V~
4 A/250 V~
0,1 A/230 V–
Opens (with increasing temperature)
Ag Ni
T 30
II after suitable installation
Surface mounting
Screw terminal with wire fuse
+5 °C to +30 °C
approx. 4 K
approx. 0,5 K
Thermal
-20 °C to +70 °C
IP 20
as per EN 55014
thermio 403
75 x 71 x 21
3-wire
approx. 200 mW
10 A/250 V~
4 A/250 V~
0,1 A/230 V–
Opens (with increasing temperature)
Ag Ni
T 30
II after suitable installation
yes
Heating On/Off
Surface mounting
Screw terminal with wire fuse
+5 °C to +30 °C
approx. 0,5 K
Thermal
-20 °C to +70 °C
IP 20
as per EN 55014
thermio 513
75 x 71 x 21
3-wire
approx. 200 mW
10 A/250 V~
4 A/250 V~
0,1 A/230 V–
Opens (with increasing temperature)
Ag Ni
T 30
II after suitable installation
yes
LED green
Overnight temperature drop On/Off
Surface mounting
Screw terminal with wire fuse
+5 °C to +30 °C
approx. 4 K
approx. 0,5 K
Thermal
-20 °C to +70 °C
IP 20
as per EN 55014
Lower temperature O
N
Set the room temperature
e. g. 22°C
=
^
18°C
Lower temperature OFF
Set the room temperature
e. g. 22°C
=
^
22°C
ON
OFF
Lower temperature O
N
Set the room temperature
e. g.22 °C
LED ON +
=
^
18°C
Lower temperature OFF
Set the room temperature
e. g.22 °C
LED OFF +
=
^
22°C
LED OFF +
=
^
22°C
ON
OFF
ON
* Lower temperature = Comfort temperature minus 4 K (Kelvin)
Pobierz instrukcję w języku polskim (PDF, 2.31 MB)
(Apelujemy o dbanie o środowisko i drukowanie instrukcji tylko wtedy, gdy jest to niezbędne)

Loading…

Ocena

Podziel się z nami swoją opinią na temat Grässlin Thermio 402 Termostat i oceń urządzenie. Chcesz podzielić się swoimi doświadczeniami z tym produktem lub zadać pytanie? Zostaw komentarz na dole strony.
Czy jesteś zadowolony z Grässlin Thermio 402 Termostat?
Tak Nie
Zostań pierwszą osobą, która oceni ten produkt
0 głosów

Dołącz do dyskusji na temat tego produktu

Tutaj możesz podzielić się swoją opinią na temat Grässlin Thermio 402 Termostat. Jeśli masz pytanie, najpierw dokładnie przeczytaj instrukcję. Zapytanie o instrukcję można złożyć za pomocą naszego formularza kontaktowego.

Więcej o tej instrukcji

Rozumiemy, że miło jest mieć papierową instrukcję obsługi Grässlin Thermio 402 Termostat. Zawsze możesz pobrać instrukcję z naszej strony internetowej i wydrukować ją samodzielnie. Jeśli chcesz otrzymać oryginalną instrukcję, zalecamy skontaktowanie się z Grasslin. Być może będą w stanie dostarczyć oryginalną instrukcję. Szukasz instrukcji swojego Grässlin Thermio 402 Termostat w innym języku? Wybierz preferowany język na naszej stronie głównej i wyszukaj numer modelu, aby sprawdzić, czy jest on dostępny.

Dane techniczne

Marka Grasslin
Model Thermio 402
Kategoria Termostaty
Typ pliku PDF
Rozmiar pliku 2.31 MB

Wszystkie podręczniki dla Grässlin Termostaty
Więcej podręczników Termostaty

Często zadawane pytania dotyczące Grässlin Thermio 402 Termostat

Nasz zespół wyszukuje przydatne informacje na temat produktu i udziela odpowiedzi na często zadawane pytania. Jeśli znajdziesz nieścisłości lub błędy w naszych odpowiedziach na pytania, poinformuj nas o tym przy pomocy naszego formularza kontaktowego.

Jaka jest martwa strefa termostatu? Zweryfikowany

Wiele nowoczesnych termostatów ma martwą strefę. Jeśli temperatura odbiega o mniej niż 4 ° C od ustawionej temperatury, system nie będzie się nagrzewał ani chłodził. Ta tak zwana martwa strefa termostatu zapobiega zbyt częstemu włączaniu i wyłączaniu systemu, oszczędzając energię.

To było pomocne (1592) Czytaj więcej

W jakim miejscu najlepiej zamontować termostat? Zweryfikowany

Najlepsze miejsce na termostat to około 1,5 metra nad ziemią. Nigdy nie umieszczaj termostatu w pobliżu grzejnika lub innego urządzenia emitującego ciepło ani nie wystawiaj go na bezpośrednie działanie promieni słonecznych. Wybierz pomieszczenie, które jest często używane. W większości przypadków jest to salon.

To było pomocne (996) Czytaj więcej
Instrukcja Grässlin Thermio 402 Termostat

Produkty powiązane

Powiązane kategorie