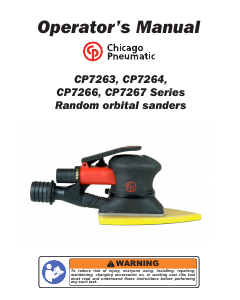
Instrukcja Stayer DELTA 150 Szlifierka delta

Potrzebujesz instrukcji dla swojego Stayer DELTA 150 Szlifierka delta? Poniżej możesz bezpłatnie obejrzeć i pobrać instrukcję w formacie PDF w języku polskim. Ten produkt ma obecnie 1 często zadawane pytanie, 0 komentarzy i ma 0 głosów. Jeśli nie jest to podręcznik, którego szukasz, skontaktuj się z nami.

Czy Twój produkt nie działa, a w instrukcji obsługi brakuje rozwiązania Twojego problemu? Udaj się do Repair Café, gdzie naprawisz swój sprzęt za darmo.

Instrukcja

Loading…

ENGLISH
9
9
This manual is consistent with the date of manufacture of
your machine, you will nd information on the technical
data of the machine acquired manual check for updates of
our machines on the website:
www.grupostayer.com
The machine is intended for dry sanding and polishing of
wood, plastic, metal, ller, as well as for painted surfaces.
It is especially suitable for proles, corners or hard to reach
locations. Please refer to the booklet included in delivery
for the safety instructions.
Machine-specic Safety Warnings
Use the machine only for dry sanding. Penetration of water
into the machine increases the risk of an electric shock.
Caution, re hazard! Avoid overheating the object
being sanded as well as the sander. Always
empty the dust collector before taking breaks.
In unfavourable conditions, e. g., when sparks emit from
sanding metals, sanding debris in the dust bag, micro lter
or paper sack (or in the lter sack or lter of the vacuum
cleaner) can self-ignite. Particularly when mixed with
remainders of varnish, polyurethane or other chemical
materials and when the sanding debris is hot after long
periods of working.
Secure the workpiece. A workpiece clamped with
clamping devices or in a vice is held more secure than
by hand.
Keep your workplace clean. Blends of materials are
particularly dangerous. Dust from light alloys can burn
or explode.
Never use the machine with a damaged cable. Do
not touch the damaged cable and pull the mains
plug when the cable is damaged while working.
Damaged cables increase the risk of an electric shock.
Functional Description
Read all safety warnings and all instructions.
Failure to follow the warnings and instructions may
result in electric shock, re and/or serious injury.
Please read the operating instructions carefully before
assembling and using.
Assembly
Fitting the dust bag (Fig. 2)
Fit the dust bag 6, in the vacuum intake 9.
Important! For health safety reasons it is imperative that
you use a dust bag.
Assembly the dust collector box (LH190E g.5)
Place the dust box 6 in the vacuum intake 9.
- Making the notches t into the hopper 6.
- Proceed to rotate in clockwise direction, until it locks.
- To remove the hopper 6, rotate counterclockwise and
pull out.
Fastening the sanding/grinding paper (Fig. 4-6-7-8).
First disconnect the power plug.
- Release the latches 8 on both sides.
- Place the abrasive sanding/grinding sheet outward the
sanding plate
- Place the sanding/grinding sheet edge on the top of
the sanding plate 7 and fasten the front retainer 8
(LH190E).
- Attach sheet sanding/grinding to sanding plate 7. Sure
it is taut.
- Finish attaching the sanding/grinding sheet to the back
retainer 8. (Fig. 4, 7-8).
- Make sure the holes in the sanding/grinding sheet
match the sanding plate 7 for a perfect vacuum.
Punch plate (LH190E, Fig. 9)
It has been provided a punch plate 10 to make holes in the
sandpaper.
- The holes should be lined up with the holes in the
sander base 7.
- Should be placed, as indicated before, the sanding/
grinding sheet.
- Then put the punch plate 10 on a stable level surface,
and proceed to place the sanding plate 7 with the
sanding sheet and placed within the punch plate,
making a little pressure down to punch correctly.
Functions desciption (Fig.1)
1. Front handle
2. ON / OFF switch
3. Speed control*
4. Locking knob
5. Main handle
6. Dust bag/dust collection box (LH190E)
7. Sanding Plate
8. Sandpaper holding retainer
9. Vacuum intake
10. Plate punch sandpaper. (LH190E)
11. Cover dust box.
12. Hepa Filter dust.
*The accessories are optional and do not correspond to the
standard included material.
Placement and Testing
ON/OFF switch (Fig. 3)
To switch on: Press switch 2
Continuous operation: Secure switch 2 with locking knob 4.
To switch o󰀨: Briey hold down switch 2. You can preselect
the speed by turning the knurled screw in switch 2.
LH190 E: Move forward switch 2 for xed nestled operation.
Move backwards to stop.
Pobierz instrukcję w języku polskim (PDF, 2.07 MB)
(Apelujemy o dbanie o środowisko i drukowanie instrukcji tylko wtedy, gdy jest to niezbędne)

Loading…

Ocena

Podziel się z nami swoją opinią na temat Stayer DELTA 150 Szlifierka delta i oceń urządzenie. Chcesz podzielić się swoimi doświadczeniami z tym produktem lub zadać pytanie? Zostaw komentarz na dole strony.
Czy jesteś zadowolony z Stayer DELTA 150 Szlifierka delta?
Tak Nie
Zostań pierwszą osobą, która oceni ten produkt
0 głosów

Dołącz do dyskusji na temat tego produktu

Tutaj możesz podzielić się swoją opinią na temat Stayer DELTA 150 Szlifierka delta. Jeśli masz pytanie, najpierw dokładnie przeczytaj instrukcję. Zapytanie o instrukcję można złożyć za pomocą naszego formularza kontaktowego.

Więcej o tej instrukcji

Rozumiemy, że miło jest mieć papierową instrukcję obsługi Stayer DELTA 150 Szlifierka delta. Zawsze możesz pobrać instrukcję z naszej strony internetowej i wydrukować ją samodzielnie. Jeśli chcesz otrzymać oryginalną instrukcję, zalecamy skontaktowanie się z Stayer. Być może będą w stanie dostarczyć oryginalną instrukcję. Szukasz instrukcji swojego Stayer DELTA 150 Szlifierka delta w innym języku? Wybierz preferowany język na naszej stronie głównej i wyszukaj numer modelu, aby sprawdzić, czy jest on dostępny.

Dane techniczne

Marka Stayer
Model DELTA 150
Kategoria Szlifierki delta
Typ pliku PDF
Rozmiar pliku 2.07 MB

Wszystkie podręczniki dla Stayer Szlifierki delta
Więcej podręczników Szlifierki delta

Często zadawane pytania dotyczące Stayer DELTA 150 Szlifierka delta

Nasz zespół wyszukuje przydatne informacje na temat produktu i udziela odpowiedzi na często zadawane pytania. Jeśli znajdziesz nieścisłości lub błędy w naszych odpowiedziach na pytania, poinformuj nas o tym przy pomocy naszego formularza kontaktowego.

Czy mogę przechowywać elektronarzędzia w szopie lub garażu? Zweryfikowany

Ogólnie rzecz biorąc, elektronarzędzia można przechowywać w szopie lub garażu, nawet jeśli czasami tam zamarza. Jednak dla żywotności elektronarzędzia lepiej jest przechowywać je w suchym miejscu, bez większych wahań temperatury. W szopie lub garażu różnice temperatur mogą powodować kondensację, która może powodować rdzę. Ponadto narzędzia zasilane akumulatorami działają krócej i nie ładują się tak dobrze w bardzo niskich temperaturach. Aby mieć pewność, w jaki sposób elektronarzędzie powinno być przechowywane, zawsze dokładnie przeczytaj instrukcję obsługi.

To było pomocne (14) Czytaj więcej

Instrukcja Stayer DELTA 150 Szlifierka delta

Produkty powiązane

Powiązane kategorie