
Deutsch
Einführung
Vielen Dank, dass Sie sich für ein Rossmax Sphygmomanometer Palm-Typ entschieden haben. Die
Messung mit einem Palm-Typ Sphygmomanometer entspricht einer Messung von geschulten Perso-
nal mit der auskultatorischen Methode mit Manschette/Stethoskop.
Das Sphygmomanometer Palm-Typ ist durch ein etabliertes internationales Garantieprogramm
gegen Herstellungsfehler abgesichert. Wegen Garantieinformationen wenden Sie sich bitte an den
Hersteller Rossmax International Ltd.
Achtung: Beachten Sie die beiliegenden Dokumente. Lesen Sie diese Bedienanleitung vor
Verwendung sorgfältig durch. Bitte bewahren Sie diese Bedienanleitung auf.
Vorläuge Anmerkungen
Das Palm-Typ Sphygmomanometer erfüllt die Europäischen Regulationen welche der Richtlinie der
Medizinprodukte unterstellt ist und trägt die CE-Markierung “CE0120“. Die Qualität des Geräts wurde
überprüft und entspricht den Forderungen der Richtlinie des EU-Rates 93/42/EEC (Medizingeräte-
richtlinie) Anhang I, wesentliche Anforderungen, sowie den entsprechend harmonisierten Normen.
EN ISO 81060-1: 2012 Nichtinvasive Blutdruckmessgeräte - Teil 1: Anforderungen und Prüfverfahren
für nicht automatisierte Messarten.
Um genaue Messungen zu gewährleisten, wird dieser Monitor empfohlen, neu kalibriert werden alle
zwei Jahre.
Infos zum Blutdruck
Es ist wichtig, das Sie Ihren Arzt regelmässig konsultieren. Ihr Arzt wird Ihnen Ihren normalen Blut-
druckschwankungsbereich sowie den Punkt mitteilen, an dem für Sie ein Risiko besteht.
Zur zuverlässigen Überwachung und Bezugnahme auf Blutdruckwerte empfehlen wir, langfristig Pro-
tokolle zu führen. Laden Sie das Blutdruckprotokoll (Tabelle zur Erfassung und Verfolgung wichtiger
Daten: Datum, Zeit, Blutdruck, Pulsfrequenz und Körperzustand) unter www.rossmax.com.
Anlegen der Manschette
1. Legen Sie die Manschette auf den nackten Oberarm, und wickeln Sie sie so um den Oberarm, dass
der Schlauch zu Ihrer Handäche zeigt und die Arterienmarkierung über Ihrer Hauptarterie liegt.
2. Der Rand der Manschette sollte 1,5 bis 2,5 cm über der Innenseite des Ellbogengelenks liegen.
3. Die Wahl der richtigen Manschettengrösse ist für eine exakte Messung wichtig.
Messungsverfahren
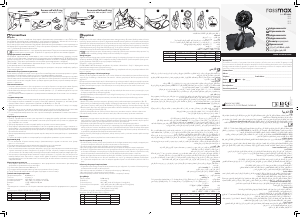
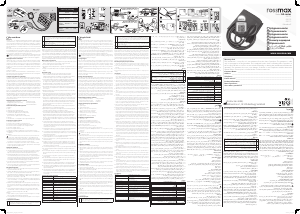
1. Legen Sie den Stethoskopkopf auf die Hauptarterie unter der Arterienmarkung der Manschette.
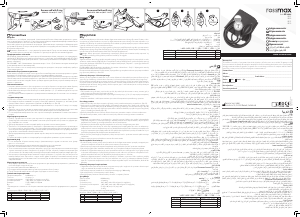
(Abbildung )
2. Wenn das Ventil geschlossen ist, pumpen Sie mit dem Gummiball, bis Sie einen Wert 20 – 30 mmHg
über Ihrem normalen Blutdruck erreicht haben. (Abbildung )
3. Önen Sie das Ventil, um die Manschette vorsichtig mit 2 bis 3 mmHg pro Sekunde zu entlasten
(Abbildung )
4. Wenn die Korotko-Töne zu hören sind, speichern Sie den betreenden Messwert als systolischen
Druck, wenn sie verschwinden, als diastolischen Druck.
5. Nach Abschluss der Messung önen Sie das Ventil vollständig, um die Restluft in der Manschette
zu entfernen.
Sicherheitshinweise
1. Das Messgerät enthält hoch genaue Bauteile. Vermeiden Sie daher extreme Temperaturen, extreme
Luftfeuchtigkeit und direkte Sonneneinstrahlung. Lassen Sie das Gerät nicht herunterfallen, und
vermeiden Sie starke Stossbelastungen des Grundgeräts und schützen Sie es vor Staub.
2. Das Gerät sollte nicht von Kindern bedient werden, um Gefahren zu vermeiden.
3. Die Wartung des Palm-Typ Sphygmomanometer muss in einem autorisierten Betrieb vorgenom-
men werden. Sie sollten das Gerät weder mit Werkzeugen önen, noch versuchen, etwas in dem
Gerät selbst einzustellen. Wenn Sie Probleme haben, wenden Sie sich an Ihren lokalen Händler oder
an Rossmax International Ltd.
4. Sie können die Funktion jederzeit stoppen, önen Sie dazu das Entlastungsventil. Die Luft in der
Manschette wird schnell abgelassen.
5. Geben Sie zur Rückverfolgung bei Serviceleistungen die Seriennummer auf der Vorderseite an.
Lagerung und Wartung
1. Wickeln Sie nach der Messung die Manschette um das Blutdruckmessgerät und den Gummiball,
und bewahren Sie diese in der Transporttasche zusammen mit dem Stethoskop auf.
2. Entfernen Sie die Luft immer vollständig aus der Manschette, bevor Sie diese lagern.
3. Berühren Sie niemals das Manschettengewebe oder Teile mit einem spitzen Gegenstand.
4. Die Genauigkeit des Blutdruckmessgeräts lässt sich visuell überprüfen: Überprüfen Sie, ob der Zei-
ger unter der „0“ markierten Fläche liegt, wenn die Luft vollständig aus der Manschette abgelassen
wurde. Unter normalen Bedingungen wird empfohlen, die Kalibrierung alle zwei Jahre durchzu-
führen.
5. Reinigen Sie das Gehäuse des Blutdruckmessgeräts vorsichtig mit einem feuchten, weichen Tuch.
Üben Sie keinen Druck aus. Waschen Sie die Manschette nicht und behandeln Sie sie nicht mit
chemischen Reinigern. Verwenden Sie niemals Verdünnungsmittel, Alkohol oder Benzin als Reini-
gungsmittel.
Sicherheitshinweise
1. Das Rossmax Palm-Typ Sphygmomanometer ist exklusiv entworfen worden um den Blutdruck auf
gesunder Haut am Oberarm oder Oberschenkel zu messen.
2. Das Gerät nicht mit mehr als 300 mmHg aufblasen.
3. Messen Sie Ihren Blutdruck nicht länger als 3 Minuten.
4. Warten Sie mindestens 5 Minuten, bevor Sie Messungen wiederholen.
Technische Daten
Messbereich: 0-300 mmHg
Messgenauigkeit: ±3 mmHg
Einsatzumgebung: 10 °C–40 °C; maximal 85 % RH
Lagerbedingungen: -10 °C–60 °C; 10 %–90 % RH maximal
Abmessungen: 163 x 60 x 45 mm (L x B x H)
Gewicht: 170 ± 5 g
Modell No.: GD101 / GD102 / GD111 / GD112
GD Manschette mit D-Ring Manschette ohne D-Ring Stethoskop
101 •
102 • •
111 •
112 • •
Español
Introducción
Gracias por elegir el esgmomanómetro aneroide manual de Rossmax. Los resultados obtenidos
mediante el esgmomanómetro digital aneroide son equivalentes a los obtenidos por un observador
debidamente entrenado en el uso del método de auscultación con brazal y estetoscopio.
El esgmomanómetro aneroide está protegido contra defectos de fabricación mediante un programa
de garantía internacional. Para una información acerca de la garantía, usted puede contactar al fabri-
cante, Rossmax International Ltd, o a sus distribuidores locales.
Atención: Consulte los documentos anexos. Por favor, lea este manual cuidadosamente antes
del uso. Por favor, fíjese en guardar este manual.
Notas preliminares
EL esgmomanómetro aneroide manual, cumple con las normas europeas descritas en en la directiva
sobre dispositivos médicos y lleva el marcado “CE0120”. La calidad del equipo ha sido vericado y
cumple con las disposiciones de la Directiva del Consejo 93/42/CEE CE (Directiva de productos sani-
tarios) Anexo I Requisitos esenciales y aplicado normas armonizadas ..
EN ISO 81060-1: 2012 esgmomanómetros - Parte 1: no invasivos: Requisitos y métodos de ensayo
para tipos de medición no automatizados.
Para asegurar mediciones precisas, se recomienda este monitor para ser recalibrado cada dos años.
Acerca de presión arterial
Es importante que consulte a su médico periódicamente. Su médico le informará acerca de su rango
de presión arterial personal normal, así como acerca del límite a partir del cual representará un riesgo
para usted.
Para un monitoreo y una referencia ables de la presión arterial, recomendamos que mantenga regis-
tros a largo plazo. Por favor, descargue el diario de presión arterial (tabla para el registro y seguimiento
de información crucial: fecha, hora, presión arterial, frecuencia del pulso y condición física) de www.
rossmax.com.
Empleo del brazalete
1. Posicione el brazalete en la parte superior del brazo desnuda, enróllelo con el tubo mostrando hacia
la palma de la mano y la marca de arteria sobre su arteria principal.
2. El borde del brazalete deberá estar a aprox. 1,5 a 2,5 cm sobre el lado interior de la articulación del
codo.
3. El uso del tamaño correcto de brazalete es importante para una lectura exacta.
Procedimientos de medición
1. Posicione la cápsula del estetoscopio sobre la arteria principal debajo de la marca de arteria en el
brazalete. (Fig. )
2. Con la válvula cerrada, comprima la pera y continúe bombeando hasta un valor 20-30 mmHg por
encima de su presión arterial normal. (Fig. )
3. Abra la válvula para desinar el brazalete gradualmente a una velocidad de 2-3 mmHg por segundo.
(Fig. )
4. Registre el inicio del sonido de Korotko como la presión sistólica y la desaparición de estos sonidos
como la presión diastólica.
5. Después de haber acabado la medición, abra la válvula completamente para evacuar todo el aire
del brazalete.
Notas de precaución
1. La unidad contiene ensambles de alta precisión. Por lo tanto, evite temperaturas y humedad extre-
mas, y la exposición directa al sol. Evite caídas y golpes intensos de la unidad principal, y protéjala
de polvo.
2. La unidad no deberá ser operada por niños para evitar situaciones peligrosas.
3. El esgmomanómetro aneroide manual no dispone de ningún elemento ajustable por el usuario.
No deberá usar ninguna herramienta para abrir el aparato ni deberá tratar de ajustar alguna cosa
en el interior del aparato. Con cualquier problema, por favor contacte a su distribuidor local o a
Rossmax International Ltd.
4. Para parar el funcionamiento en cualquier momento, abra la válvula de purga de aire, y el aire dentro
del brazalete será purgado rápidamente.
5. El número de serie en la esfera indica para el seguimiento de servicio.
Almacenaje y mantenimiento
1. Después de la medición, enrolle el brazalete alrededor del esgmomanómetro y la pera y guárdelo
en el estuche de transporte junto con el estetoscopio.
2. Siempre desine el brazalete totalmente antes de guardarlo.
3. Nunca toque el material o partes del brazalete con algún objeto loso.
4. La exactitud del esgmomanómetro puede vericar se visualmente: simplemente asegúrese de
que la aguja se encuentre dentro del área indicada debajo de "0" al estar la unidad completamente
desinada. Bajo condiciones normales, se recomienda llevar a cabo una calibración cada dos años.
5. Limpie el cuerpo del esgmomanómetro y el brazalete cuidadosamente con un trapo suave lige-
ramente húmedo. No ejerza presión. No lave el brazalete ni use productos de limpieza químicos.
Nunca use diluyentes, alcohol o petróleo (gasolina) para limpiar.
Información de seguridad
1. El esgmomanómetros aneroide manual de Rossmax ha sido diseñado exclusivamente para la
medición de la presión arterial en el brazo o en el muslo y sobre piel sana.
2. No ine a más de 300 mmHg.
3. No mida la presión arterial por más de 3 minutos.
4. Espere por lo menos 5 minutos antes de repetir una medición.
Especicaciones
Rango de medición: 0-300 mmHg
Exactitud: ±3 mmHg
Ambiente de operación: 10°C~40°C; 85% HR máx
Ambiente de almacenaje: -10°C~60°C; 10%~90% HR máx
Dimensiones: 163L)x60(A)x45(H)mm
Peso: 170±5g
*Las especicaciones están sujetas a cambios sin noticación.
Modelo No.: GD101 / GD102 / GD111 / GD112
GD Manguito con D-Ring Manguito sin D-Ring Stethoscope
101 •
102 • •
111 •
112 • •
Française
Consignes D’utilisation
Merci d’avoir choisi un Rossmax Sphygmomanomètre type palm. La mesure avec un Sphygmo-
manomètre type palm correspond à une mesure avec la méthode d’auscultation avec brassard/
stéthoscope par du personnel qualié.
Le sphygmomanomètre type palm est garanti contre les défauts de fabrication par un programme
de garantie internationale. Pour plus d’informations sur la garantie, contactez le fabricant, Rossmax
International Ltd., ou le distributeur local.
Attention: Consultez les documents d’accompagnement. Veuillez lire ce manuel attentive-
ment avant l’emploi. Veillez à conserver ce manuel.
Remarques préliminaires
Le Sphygmomanomètre type palm est conforme aux réglementations européennes sous la direc-
tive des dispositifs médicaux et porte le marquage « CE0120 » de la CE. La qualité du dispositif a été
vériée et se conforme aux dispositions des conditions essentielles de l’annexe I de la directive du
Conseil de l’EC 93/42/EEC (directive d’appareil médical) et des normes harmonisées appliquées.
EN ISO 81060-1: Partie non envahissante de 2012 sphygmomanometers- : Exigences et méthodes
d’essai pour le type de mesure non automatisée.
Pour assurer des mesures précises, ce moniteur est recommandé pour être recalibré tous les deux
ans.
A propos de la pression artérielle
Veuillez consulter votre médecin régulièrement. Il vous indiquera votre plage de pression artérielle
normale de même que les valeurs considérées comme un risque.
Pour une surveillance able et une documentation de la pression artérielle, il est recommandé de
conserver des enregistrements à long terme. Veuillez télécharger le carnet de pression artérielle
(diagramme pour suivi, données: date, heure, pression artérielle, pouls et état physique) sur www.
rossmax.com.
Mise en place du brassard
1. Ajustez le brassard autour du bras nu. Serrez-le avec le tuyau orienté vers la paume et le repère de
l’artère placé sur l’artère principale.
2. Le bord du brassard doit se situer env. 1,5 - 2,5 cm au-dessus du creux du coude.
3. L’utilisation de la taille correcte est indispensable pour des mesures exactes.
Procédures de mesure
1. Placez la tête du stéthoscope sur l’artère principale, sous le repère de l’artère du brassard. (Fig. )
2. La valve étant fermée, pressez la poire et continuez à pomper jusqu’à ce que la pression soit supé-
rieure de 20-30 mmHg à la pression artérielle normale. (Fig. )
3. Ouvrez la valve pour dégoner le brassard graduellement à raison de 2-3 mmHg par seconde.
(Fig. )
4. Prenez l’émission de bruits Korotko comme pression systolique et la disparition de ces bruits
comme pression diastolique.
5. A la n de la mesure, ouvrez entièrement la valve pour libérer l’air restant dans le brassard
Prudence
1. L’instrument contient des éléments de haute précision. Evitez par conséquent des températures
extrêmes, l’humidité et un rayonnement solaire direct. Evitez de faire tomber l’instrument ou de
l’exposer à des chocs violents et protégez-le de la poussière.
2. Conservez l’instrument hors de portée des enfants pour éviter des situations dangereuses.
3. Le maintien du Sphygmomanomètre type palm doit être eectué par un service autorisé. N’ouvrez
pas l’instrument avec un outil et n’essayez pas de le réparer. Si vous rencontrez des problèmes,
veuillez contacter le distributeur local ou Rossmax International Ltd.
4. Pour arrêter la mesure à tout moment, ouvrez la valve de libération de l’air. L’air du brassard sera
rapidement évacué.
5. Le numéro de série pour le suivi SAV.
Rangement et maintenance
1. Après la mesure, enroulez le brassard autour du sphygmomanomètre et de la poire, et mettez-le
dans l’étui, avec le stéthoscope.
2. Dégonez le brassard entièrement avant de le ranger.
3. Ne touchez jamais le tissu ou des pièces du brassard avec un instrument tranchant.
4. La précision du sphygmomanomètre peut être contrôlée de façon visuelle: assurez-vous simple-
ment que l’aiguille reste “0” à l’état dégoné. Prévoyez un étalonnage tous les deux ans dans des
conditions d’utilisation normales.
5. Nettoyez le boîtier du sphygmomanomètre et le brassard avec précaution à l’aide d’un chion
doux légèrement humide. N’appuyez pas. Ne lavez pas le brassard et ne le nettoyez pas avec un
détergent chimique. N’utilisez jamais de diluant, d’alcool ou d’essence comme nettoyant.
Informations de sécurité
1. Le Rossmax Sphygmomanomètre type palm a été exclusivement conçu pour mesurer la pression
artérielle à la peau saine sur le bras ou la cuisse.
2. Ne gonez pas le brassard au-delà de 300 mmHg.
3. Ne mesurez pas la pression artérielle plus de 3 minutes.
4. Attendez au moins 5 minutes avant de refaire une mesure.
Caractéristiques
Plage de mesure: 0-300 mmHg
Précision: ±3 mmHg
Environnement de travail: 10 °C~40 °C; 85 % HR max
Environnement de stockage: -10 °C~60 °C; 10 %~90 % HR
Dimensions: 163(L)x60(l)x45(H) mm
Poids: 170±5 g
*Caractéristiques modiables sans préavis.
Modèle n °: GD101 / GD102 / GD111 / GD112
GD Rossmax manchette avec “D-ring” Brassard sans D-ring Stethoscope
101 •
102 • •
111 •
112 • •
English
Introduction
Thank you for choosing Rossmax Palm Type Aneroid Sphygmomanometer. Blood pressure measure-
ments determined with Palm Type Aneroid Sphygmomanometer are equivalent to those obtained
by a trained observer using cu/stethoscope auscultation method.
Palm Type Aneroid Sphygmomanometer is protected against manufacturing defects by an estab-
lished International Warranty Program. For warranty information, you can contact the manufacturer,
Rossmax International Ltd. or your local distributors.
Attention: Consult the accompanying documents. Please read this manual carefully before
use. Please be sure to keep this manual.
Preliminary Remarks
Palm Type Aneroid Sphygmomanometer complies with European Regulation underlying the Medi-
cal Device Directive and bears the CE mark “ CE0120” . The quality of device has been veried and
conforms to the provisions of the EC council directive 93/42/EEC (Medical Device Directive) Annex I
essential requirements and applied harmonized standards..
EN ISO 81060-1: 2012 Non-invasive sphygmomanometers - Part 1: Requirements and test methods
for non-automated measurement type.
To ensure accurate measurements, this monitor is recommended to be re-calibrated every two years.
About Blood Pressure
It is important that you consult with your physician regularly. Your physician will tell you your normal
blood pressure range as well as the point at which you will be considered at risk.
For reliable monitoring and reference of blood pressure, keeping long term records is recommended.
Please download the blood pressure log (chart for recording and tracking crucial info: date, time,
blood pressure, pulse rate and body condition) at www.rossmax.com.
Applying the Cu
1. Place the cu over the bare upper arm, wrap it with the tube pointing your palm, and the artery
mark over your main artery.
2. The edge of the cu should be at approximately 1.5 to 2.5 cm above the inner side of the elbow
joint.
3. Using the correct cu size is important for an accurate reading.
Measurement Procedures
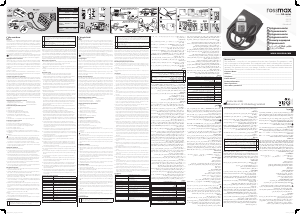
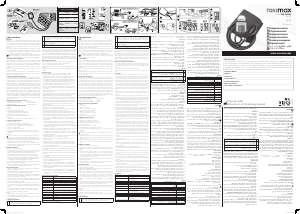
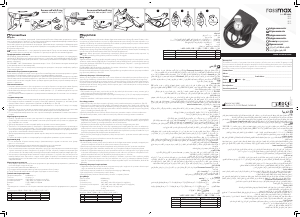
1. Place the stethoscope head over the main artery, underneath the artery mark of the cu. (Fig. )
2. With the valve closed, press the bulb and continue pumping to a value 20-30 mmHg above your
normal blood pressure. (Fig. )
3. Open the valve to deate the cu gradually at a rate of 2-3 mmHg per second. (Fig. )
4. Record the onset of Korotko sound as the systolic pressure, and the disappearance of these
sounds as diastolic pressure.
5. After measurement is completed, fully open the valve to release any remaining air in the cu.
Cautionary Notes
1. The unit contains high-precision assemblies. Therefore, avoid extreme temperatures, humidity,
and direct sunlight. Avoid dropping or strongly shocking the main unit, and protect it from dust.
2. The unit should not be operated by children to avoid hazardous situations.
3. The maintenance of the Palm Type Aneroid Sphygmomanometer must be performed by an
authorized service. You should not use any tool to open the device nor should you attempt to
adjust anything inside the device. If you have any problems, please contact your local distributor
or Rossmax International Ltd.
4. To stop operation at any time, open the air release valve, and the air in the cu will be rapidly
exhausted.
5. The serial number is for service tracking.
Storage and Maintenance
1. After measurement, wrap cu around sphygmomanometer and bulb and store in the carrying
case together with the stethoscope.
2. Always deate cu completely before storage.
3. Never touch the cu fabric or parts with a sharp instrument.
4. Sphygmomanometer accuracy can be checked visually : simply be certain the needle rests under
“0” when the unit is fully deated. Under normal condition, it is recommended that calibration be
completed every two years.
5. Clean the cu with a slightly damp sponge or cloth. If necessary, it may be washed in cool water
with mild soap. Remove bladder prior to washing. Rinse and air dry. Do not iron. Clean the bladder
and bulb with a slightly damp sponge or cloth. To protect from cracking or discoloring, wipe with
a soft cloth moistened with ethanol. Clean valve and gauge with a soft dry cloth.
Safety Information
1. Rossmax Palm Type Aneroid Sphygmomanometer is exclusively designed for blood pressure
measurement at the upper arm or thigh on healthy skin.
2. Do not inate to more than 300 mmHg.
3. Do not take your blood pressure for more than 3 minutes.
4. Wait for at least 5 minutes before repeated measurements.
Specications
Measurement Range: 0-300 mmHg
Accuracy: ±3 mmHg
Operation environment: 10°C~40°C; 85% RH max
Storage environment: -10°C~60°C; 10%~90% RH
Dimensions: 163(L)x60(W)x45(H)mm
Weight: 170±5g
*Specications are subject to change without notice.
Model No.: GD101 / GD102 / GD111 / GD112
GD Cu with D-ring Cu without D-ring Stethoscope
101 •
102 • •
111 •
112 • •
300
280
260
240
220
200
180
160140
120
100
80
60
40
20
0
mmHg
300
280
260
240
220
200
180
160140
120
100
80
60
40
20
0
mmHg
Rossmax cu with D-ring
Adult: 24 - 32 cm (9.4” - 12.6”)
Rossmax cu without D-ring
Adult: 25.4 - 40.6 cm (10.0” - 16.0”)



Dołącz do dyskusji na temat tego produktu
Tutaj możesz podzielić się swoją opinią na temat Rossmax GD101 Ciśnieniomierz. Jeśli masz pytanie, najpierw dokładnie przeczytaj instrukcję. Zapytanie o instrukcję można złożyć za pomocą naszego formularza kontaktowego.