
START
FINISH
3
4
2
60 mm
10mm
W-B
W-AW-A
Universal Electronics BV – Europe & International
P.O. Box 3332, 7500 DH Enschede
The Netherlands
WM4421
710593
RDN-1040316
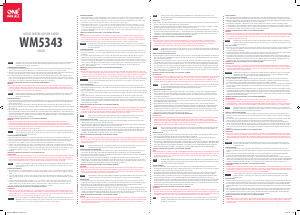
INSTALLATION MANUAL
3
Tilting Wall Mount
WM4 421
400x200/400x400
200x200/300x300
55"
MAX
35kg
(77lbs)
RATED
Maintenance
• Check that the bracket is secure and safe to use at regular intervals(at least every three months).
• Please contact your if you have any questions.distributor
-14°
0°
Pull from the top of TV to obtain a desired angle.
CAUTION:
DO NOT EXCEED RATED
LISTED WEIGHT CAPA CITY. SERIOUS
INJURY OR PROPERTY DAMAGE MAY
OCCUR!
Tighten the bottom bolts to secure the adapter brackets to the wall plate.
wall
wall
bolt
3. Hanging the TV onto the Wall Plate
4. Adjustment
1
100
25
60
5a 5b 6
A
B
C
A
Placa de pared (x1)
Base da parede (x1)
A
Nivelador (x1)
Nível de bolha (x1)
C
soporte adaptador (x2)
Extensor(adaptador) (x2)
B
M6x30 (x4)
M-A
M8x30 (x4)
M-B
D8 Arandela (x4)
D8 arruela (x4)
M-C
perno distanciador grande (x4)
espaçador (x4)
M-D
Tarugo (x5)
bucha para concreto (x5)
W-B
ST6.3x55 (x5)
W-A
D6 Arandela (x5)
D6 arruela (x5)
W-C
Packag e M
Packag e W
ST6.3x55 (x5)
W-A
concrete anchor
W-B
(x5)
D6 washer
W-C
(x5)
D8 (x4)
M-C
washer
M8x30
M-B
(x4)M6x30
M-A
(x4)
wall plate
A
(x1) (x2)
B
adapter bracket
level
C
(x1)
big spacer (x4)
M-D
Packag e M
Packag e W
ST6.3x55 (x5)
W-A
concrete anchor
W-B
(x5)
D6 washer
W-C
(x5)
D8 (x4)
M-C
washer
M8x30
M-B
(x4)M6x30
M-A
(x4)
wall plate
A
(x1) (x2)
B
adapter bracket
level
C
(x1)
big spacer (x4)
M-D
Top of the TV
wall plate
A
(x1) (x2)
B
adapter bracket
bubble level(x1)
C
W-B
C
W-C
W-A
C
Component Checklist
Package W
ST6.3x55 (x5)
W-A
concrete anchor
W-B
(x5)
D6 washer
W-C
(x5)
WARNING
• This mounting bracket was designed to be installed and utilised ONLY as specified in this
manual. Improper installation of this product may cause damage or serious injury.
• This product should only be installed by someone with good mechanical ability who has
basic building experience and fully understands this manual.
• Make sure that the supporting surface will safely support the combined weight of the
equipment and all attached hardware and components.
• Always use an assistant or mechanical lifting equipment to safely lift and position the
equipment.
• Tighten screws firmly, but do not over tighten. Over tightening can cause damage to the
items, This greatly reduces their holding power.
• This product is intended for indoor use only. Using this product outdoors could lead to
product failure and personal injury.
IMPORTANT:
Ensure that you have received all parts according to the component checklist prior to installation.
If any parts are missing or faulty, telephone your local distributor for a replacement.
D (x4)
M-F
5 washer D8 (x4)
M-G
washer
M8x20
M-C
(x4)
M5x14
M-A
(x4) M6x14
M-B
(x4)
big
M-I
spacer (x4)
M6x30
M-D
(x4)
M8x30
M-E
(x4)
small spacer (x8)
M-H
TV
TV
TV
NOTE: Read the entire instruction manual before you start installation and assembly.
Tighten all s crews but do not over tighten.
· Position the adapter brackets as close as possible to the center of the TV.
· Screw the adapter brackets onto the TV.
Note: Choose the appropriate screws, washers and spacers (if necessary) according to the type of screen.
Top of the TV
M-A/M-B/M-C
M-F/M-G
M-C
M-G
M-H
M-C M-D/M-E/
M-G
M-H
M-H
M-G
M-I
M-D/M-E
M-G
M-I
M-D/M-E
M-H
2
Package M
1
or
Top of the TV
wall plate
A
(x1) (x2)
B
adapter bracket
bubble level(x1)
C
W-B
C
W-C
W-A
C
Component Checklist
Package W
ST6.3x55 (x5)
W-A
concrete anchor
W-B
(x5)
D6 washer
W-C
(x5)
WARNING
• This mounting bracket was designed to be installed and utilised ONLY as specified in this
manual. Improper installation of this product may cause damage or serious injury.
• This product should only be installed by someone with good mechanical ability who has
basic building experience and fully understands this manual.
• Make sure that the supporting surface will safely support the combined weight of the
equipment and all attached hardware and components.
• Always use an assistant or mechanical lifting equipment to safely lift and position the
equipment.
• Tighten screws firmly, but do not over tighten. Over tightening can cause damage to the
items, This greatly reduces their holding power.
• This product is intended for indoor use only. Using this product outdoors could lead to
product failure and personal injury.
IMPORTANT:
Ensure that you have received all parts according to the component checklist prior to installation.
If any parts are missing or faulty, telephone your local distributor for a replacement.
D (x4)
M-F
5 washer D8 (x4)
M-G
washer
M8x20
M-C
(x4)
M5x14
M-A
(x4) M6x14
M-B
(x4)
big
M-I
spacer (x4)
M6x30
M-D
(x4)
M8x30
M-E
(x4)
small spacer (x8)
M-H
TV
TV
TV
NOTE: Read the entire instruction manual before you start installation and assembly.
Tighten all s crews but do not over tighten.
· Position the adapter brackets as close as possible to the center of the TV.
· Screw the adapter brackets onto the TV.
Note: Choose the appropriate screws, washers and spacers (if necessary) according to the type of screen.
Top of the TV
M-A/M-B/M-C
M-F/M-G
M-C
M-G
M-H
M-C M-D/M-E/
M-G
M-H
M-H
M-G
M-I
M-D/M-E
M-G
M-I
M-D/M-E
M-H
2
Package M
1
or
Wallmount WM4421_710593.indd 2 04-03-16 09:55


Dołącz do dyskusji na temat tego produktu
Tutaj możesz podzielić się swoją opinią na temat One For All WM 4421 Uchwyt ścienny. Jeśli masz pytanie, najpierw dokładnie przeczytaj instrukcję. Zapytanie o instrukcję można złożyć za pomocą naszego formularza kontaktowego.