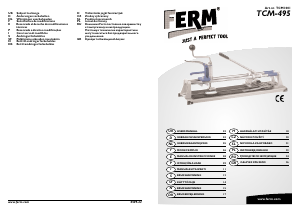
Instrukcja FERM TCM1001 Maszyna do cięcia płytek

Potrzebujesz instrukcji dla swojego FERM TCM1001 Maszyna do cięcia płytek? Poniżej możesz bezpłatnie obejrzeć i pobrać instrukcję w formacie PDF w języku polskim. Ten produkt ma obecnie zadane 3 pytania, 0 komentarzy i 0 głosów. Jeśli nie jest to podręcznik, którego szukasz, skontaktuj się z nami.

Czy Twój produkt nie działa, a w instrukcji obsługi brakuje rozwiązania Twojego problemu? Udaj się do Repair Café, gdzie naprawisz swój sprzęt za darmo.

Instrukcja

Loading…

Caution! For your own safety, carefully read these
instructions for use before using the machine.
TECHNICAL SPECIFICATIONS
6 mm
400 mm
30 -80 mm
0-45
o
TABLE OF CONTENTS:
1. SPECIAL SAFETY INSTRUCTIONS
2. ASSEMBLY
3. HOW TO CUT AND BREAK TILES
4. MAINTENANCE
Faulty and/or discarded electrical or electronic
apparatus have to be collected at the appropriate
recycling locations.
1. SPECIAL SAFETY
INSTRUCTIONS
1. The tile cutting machine is fitted with a replaceable
circular blade. Therefore, keep children away.
2. After use the machine must be stored in a safe and
dry place, away from children.
3. This machine has been designed for cutting and
breaking glazed tiles, and must not be used for any
other purpose.
4. When using the tile cutting machine make sure to
keep extension leads and such away from the
machine.
5. Always place the tile cutting machine on a level and
firm surface.
6. CAUTION! The edges of cut tiles are sharp.
2. ASSEMBLY
Assemble the tile cutting machine as shown in the
drawing.
ASSEMBLY OF THE TILE CUTTING
MACHINE
Remove all the parts from the box and assemble the tile
cutting machine as follows:
1. Slide the black rubber feet (T) over the corners of
the tile cutter. Slide a washer onto the bolt and push
this into the rubber foot. Now slide a washer and a
nut over the bolt on the back and fasten this
properly. Repeat this for the other three corners.
2. Mount the fastening blocks (N) with the 2 tubes (M)
onto the bottom plate (V) using the 4 bolts (O) and
washers (P).
3. Screw the lever (H) onto the tube fastening (I).
4. Finally, mount the sash angle (U) onto the bottom
plate (V) using the knob (S) and washer.
ASSEMBLY OF THE HOLLOW SQUARE
CHISEL
1. Place the hollow square chisel above the hole in the
bottom plate (V).
2. Make sure that the clamping plate (E) comes under
the 2 tubes and fasten this using the socket head
wrench supplied. The socket head wrench is situated
in the black fastening plate (C).
3. It is important that the drill (G) and the knife (F) are
adjusted in such a way that they just touch the
bottom plate (V). This adjustment can be done using
the two nuts at the top of the hollow square chisel.
Then fasten these nuts against each other.
3. HOW TO CUT AND BREAK TILES
1. Use a soft-tipped (carpenter’s) pencil to mark off the
cutting line.
2. Place the tile against the stop, the glazed side facing
upward. The pencil mark must be directly below the
blade.
3. Firmly hold the tile and cut several times (at least 4)
along the mark. After each cut, press the lever more
firmly.
4. Lift the lever when it has reached the front edge of
the tile and moved it backward.
5. Subsequently the break-off unit is lifted. Repeat along
the full width of the tile until the notch is sufficiently
deep.
The cutting movement results from moving the
lever from the back edge of the tile towards its
front, while lightly pressing the lever.
WALL TILES
(single baked)
Lift the lever and position the break-off unit in the middle
of the tile. Press the lever down and the tile will break.
FLOOR TILES
(double-baked):
Sometimes these much harder tiles cannot be cut in two
by means of the break-off unit (K) on the tile cutting
machine.
In these cases after making the notch the tile must be
broken in two by tapping the underside of the tile with a
light hammer along the full length of the notch. This way
the break line will spread through the tile, and cause the
tile to break in two along the line. By means of the wing
nut (Q) the angle of the stop can be adjusted.
MAKING HOLES BY MEANS OF THE (HAND)
DRILL
1. Mount the drill attachment including the drill over
the centre of the hole in the base. It is important that
2 Ferm
Ferm 31
EXPLODED VIEW
SPARE PARTS LIST TCM-495
REF NR DESCRIPTION FERM NR
- SPARE CUTTING WHEEL TCA1001
A ELEVATING ARM 207809
E CLAMPING PLATE 207813
F CUTTER 207803
G CUTTER BRACKET 207802
I PIPE FIXTURE FOR LEVER 207807
K BREAKING HEAD 207805
Q WING NUT WITH WASHER 207819
R ANGLE INDICATOR 207820
WVU
T
S
N
P
O
L
I
H
C
B
A
D
M
E
F
K
G
Z
J
QR
Pobierz instrukcję w języku polskim (PDF, 0.6 MB)
(Apelujemy o dbanie o środowisko i drukowanie instrukcji tylko wtedy, gdy jest to niezbędne)

Loading…

Ocena

Podziel się z nami swoją opinią na temat FERM TCM1001 Maszyna do cięcia płytek i oceń urządzenie. Chcesz podzielić się swoimi doświadczeniami z tym produktem lub zadać pytanie? Zostaw komentarz na dole strony.
Czy jesteś zadowolony z FERM TCM1001 Maszyna do cięcia płytek?
Tak Nie
Zostań pierwszą osobą, która oceni ten produkt
0 głosów

Dołącz do dyskusji na temat tego produktu

Tutaj możesz podzielić się swoją opinią na temat FERM TCM1001 Maszyna do cięcia płytek. Jeśli masz pytanie, najpierw dokładnie przeczytaj instrukcję. Zapytanie o instrukcję można złożyć za pomocą naszego formularza kontaktowego.

Więcej o tej instrukcji

Rozumiemy, że miło jest mieć papierową instrukcję obsługi FERM TCM1001 Maszyna do cięcia płytek. Zawsze możesz pobrać instrukcję z naszej strony internetowej i wydrukować ją samodzielnie. Jeśli chcesz otrzymać oryginalną instrukcję, zalecamy skontaktowanie się z FERM. Być może będą w stanie dostarczyć oryginalną instrukcję. Szukasz instrukcji swojego FERM TCM1001 Maszyna do cięcia płytek w innym języku? Wybierz preferowany język na naszej stronie głównej i wyszukaj numer modelu, aby sprawdzić, czy jest on dostępny.

Dane techniczne

Marka FERM
Model TCM1001
Kategoria Maszyny do cięcia płytek
Typ pliku PDF
Rozmiar pliku 0.6 MB

Wszystkie podręczniki dla FERM Maszyny do cięcia płytek
Więcej podręczników Maszyny do cięcia płytek

Często zadawane pytania dotyczące FERM TCM1001 Maszyna do cięcia płytek

Nasz zespół wyszukuje przydatne informacje na temat produktu i udziela odpowiedzi na często zadawane pytania. Jeśli znajdziesz nieścisłości lub błędy w naszych odpowiedziach na pytania, poinformuj nas o tym przy pomocy naszego formularza kontaktowego.

Jaka jest różnica między płytkami ceramicznymi a płytkami porcelanowymi? Zweryfikowany

Obie są wykonane z gliny, ale płytki porcelanowe mają większą gęstość. Dzięki temu płytki porcelanowe są mocniejsze i trwalsze, ale także trudniejsze do cięcia. Aby uzyskać taką samą wydajność, jak w przypadku płytek ceramicznych, potrzebujesz specjalistycznych narzędzi i umiejętności.

To było pomocne (13) Czytaj więcej

Czy ma znaczenie, którą stronę płytki przycinam? Zweryfikowany

Tak, bez względu na to, którą płytkę przycinasz, najlepiej ciąć przednią część płytki skierowaną do góry. Zapewni to gładkie wykończenie i zminimalizuje ryzyko odpryskiwania.

To było pomocne (10) Czytaj więcej

Jak mogę zapobiec odpryskiwaniu moich płytek podczas ich cięcia? Zweryfikowany

Możesz nałożyć taśmę maskującą na górę płytki przed cięciem, aby zmniejszyć odpryski.

To było pomocne (10) Czytaj więcej
Instrukcja FERM TCM1001 Maszyna do cięcia płytek