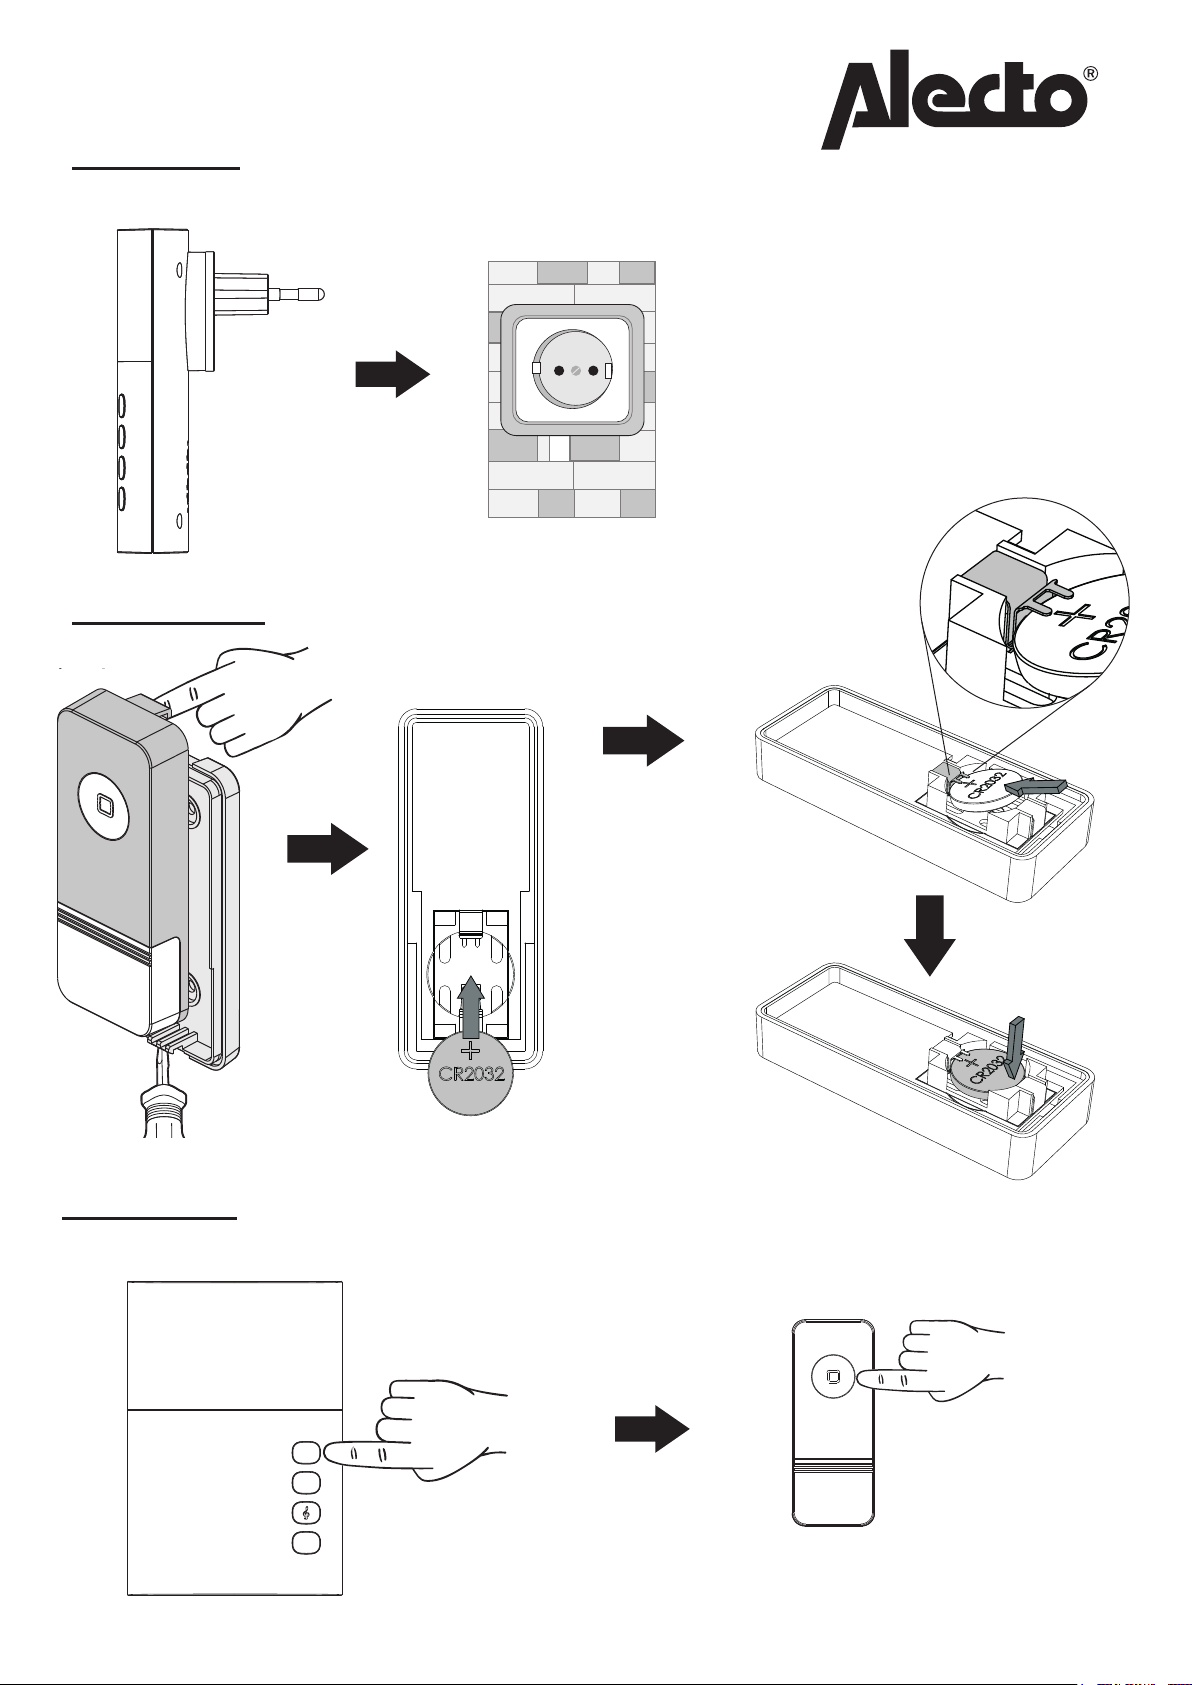
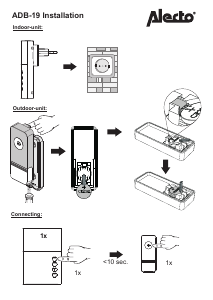
ADB-19 Installation
Outdoor-unit:
Indoor-unit:
Important Note:
● If you do not plan to use the device for a long time, such as at a vacation, please remove the
battery from Transmitter, then put them in a safe place.
● Improperly using a battery may cause it to leak and damage nearby items, and can create the
risk of fire and personal injury. Batteries should not be left in an area where the children can
reach them as they may pose a chocking hazard.
● Recycle used batteries following environmental protection practices.
Transmitter Installation:
● Stick the Transmitter on the wall or the door with
double-sided adhesive tape.
Receiver Installation:
● Plug the Receiver into any socket of AC110~240V power.
2
Battery Installation (Transmitter):
Transmitter uses a 3V CR2032 battery (included).
Open the Transmitter (by pushing in the interface located at the bottom with a flat screw driver)
and place the battery. Please be well noted with the correct battery polarity. To replace a new
battery, operate in the same way.
Press lightly the battery
holder at side
CR2032 3V Lithium Battery
Important Note:
● If you do not plan to use the device for a long time, such as at a vacation, please remove the
battery from Transmitter, then put them in a safe place.
● Improperly using a battery may cause it to leak and damage nearby items, and can create the
risk of fire and personal injury. Batteries should not be left in an area where the children can
reach them as they may pose a chocking hazard.
● Recycle used batteries following environmental protection practices.
Transmitter Installation:
● Stick the Transmitter on the wall or the door with
double-sided adhesive tape.
Receiver Installation:
● Plug the Receiver into any socket of AC110~240V power.
2
Battery Installation (Transmitter):
Transmitter uses a 3V CR2032 battery (included).
Open the Transmitter (by pushing in the interface located at the bottom with a flat screw driver)
and place the battery. Please be well noted with the correct battery polarity. To replace a new
battery, operate in the same way.
Press lightly the battery
holder at side
CR2032 3V Lithium Battery
Connecting:
Important Note:
● If you do not plan to use the device for a long time, such as at a vacation, please remove the
battery from Transmitter, then put them in a safe place.
● Improperly using a battery may cause it to leak and damage nearby items, and can create the
risk of fire and personal injury. Batteries should not be left in an area where the children can
reach them as they may pose a chocking hazard.
● Recycle used batteries following environmental protection practices.
Transmitter Installation:
● Stick the Transmitter on the wall or the door with
double-sided adhesive tape.
Receiver Installation:
● Plug the Receiver into any socket of AC110~240V power.
2
Battery Installation (Transmitter):
Transmitter uses a 3V CR2032 battery (included).
Open the Transmitter (by pushing in the interface located at the bottom with a flat screw driver)
and place the battery. Please be well noted with the correct battery polarity. To replace a new
battery, operate in the same way.
Press lightly the battery
holder at side
CR2032 3V Lithium Battery
1
Accessories List:
● 1 x Receiver ● 1 x Transmitter
● 1 x User Manual ● 1 x Double-sided adhesive
● 1 x 3 volts CR2032 battery for transmitter
Technical Specification:
● Frequency: 433.92MHz+100KHz
● Modulation Type: ASK
● Ring Volume:>85dB(within 0.5m)
● Channel space: 1 million sets of auto-learning codes
● Receiver bandwidth: ±90KHz
● Reception Sensitivity:>-105dBm
● Transmitter Power:<10mW
● Power consumption(Receiver): standby:<0.3W
● Power consumption(Transmitter): standby:<5uA working:<10mA
● Power Supply(Receiver): AC110-240V
● Power Supply(Transmitter): DC 3V (1x CR2032)
● Operating Range:>150m (in the open air)
Names for Parts:
Instruction Manual
Auto-leaning Code Wireless Door Chime
Model No.: QH-861AK
VOL
MODE
CODE
Important Note:
● If you do not plan to use the device for a long time, such as at a vacation, please remove the
battery from Transmitter, then put them in a safe place.
● Improperly using a battery may cause it to leak and damage nearby items, and can create the
risk of fire and personal injury. Batteries should not be left in an area where the children can
reach them as they may pose a chocking hazard.
● Recycle used batteries following environmental protection practices.
Transmitter Installation:
● Stick the Transmitter on the wall or the door with
double-sided adhesive tape.
Receiver Installation:
● Plug the Receiver into any socket of AC110~240V power.
2
Battery Installation (Transmitter):
Transmitter uses a 3V CR2032 battery (included).
Open the Transmitter (by pushing in the interface located at the bottom with a flat screw driver)
and place the battery. Please be well noted with the correct battery polarity. To replace a new
battery, operate in the same way.
Press lightly the battery
holder at side
CR2032 3V Lithium Battery
1x1x
1x
<10 sec.
Important Note:
● If you do not plan to use the device for a long time, such as at a vacation, please remove the
battery from Transmitter, then put them in a safe place.
● Improperly using a battery may cause it to leak and damage nearby items, and can create the
risk of fire and personal injury. Batteries should not be left in an area where the children can
reach them as they may pose a chocking hazard.
● Recycle used batteries following environmental protection practices.
Transmitter Installation:
● Stick the Transmitter on the wall or the door with
double-sided adhesive tape.
Receiver Installation:
● Plug the Receiver into any socket of AC110~240V power.
2
Battery Installation (Transmitter):
Transmitter uses a 3V CR2032 battery (included).
Open the Transmitter (by pushing in the interface located at the bottom with a flat screw driver)
and place the battery. Please be well noted with the correct battery polarity. To replace a new
battery, operate in the same way.
Press lightly the battery
holder at side
CR2032 3V Lithium Battery
Important Note:
● If you do not plan to use the device for a long time, such as at a vacation, please remove the
battery from Transmitter, then put them in a safe place.
● Improperly using a battery may cause it to leak and damage nearby items, and can create the
risk of fire and personal injury. Batteries should not be left in an area where the children can
reach them as they may pose a chocking hazard.
● Recycle used batteries following environmental protection practices.
Transmitter Installation:
● Stick the Transmitter on the wall or the door with
double-sided adhesive tape.
Receiver Installation:
● Plug the Receiver into any socket of AC110~240V power.
2
Battery Installation (Transmitter):
Transmitter uses a 3V CR2032 battery (included).
Open the Transmitter (by pushing in the interface located at the bottom with a flat screw driver)
and place the battery. Please be well noted with the correct battery polarity. To replace a new
battery, operate in the same way.
Press lightly the battery
holder at side
CR2032 3V Lithium Battery
1
Accessories List:
● 1 x Receiver ● 1 x Transmitter
● 1 x User Manual ● 1 x Double-sided adhesive
● 1 x 3 volts CR2032 battery for transmitter
Technical Specification:
● Frequency: 433.92MHz+100KHz
● Modulation Type: ASK
● Ring Volume:>85dB(within 0.5m)
● Channel space: 1 million sets of auto-learning codes
● Receiver bandwidth: ±90KHz
● Reception Sensitivity:>-105dBm
● Transmitter Power:<10mW
● Power consumption(Receiver): standby:<0.3W
● Power consumption(Transmitter): standby:<5uA working:<10mA
● Power Supply(Receiver): AC110-240V
● Power Supply(Transmitter): DC 3V (1x CR2032)
● Operating Range:>150m (in the open air)
Names for Parts:
Instruction Manual
Auto-leaning Code Wireless Door Chime
Model No.: QH-861AK
VOL
MODE
CODE
1x


Dołącz do dyskusji na temat tego produktu
Tutaj możesz podzielić się swoją opinią na temat Alecto ADB-19 Dzwonek do drzwi. Jeśli masz pytanie, najpierw dokładnie przeczytaj instrukcję. Zapytanie o instrukcję można złożyć za pomocą naszego formularza kontaktowego.