
BQ2870
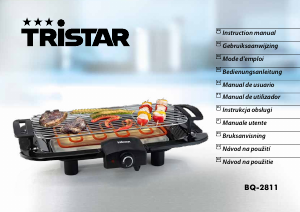
EN | Instruction manual
NL | Gebruiksaanwijzing
FR | Mode d’emploi
DE | Bedienungsanleitung
ES | Manual de usuario
PT | Manual de utilizador
IT | Manuele utente
SV | Bruksanvisning
PL | Instrukcja obsługi
CS | Návod na použití
SK | Návod na použitie
RU | Руководство по
эксплуатации
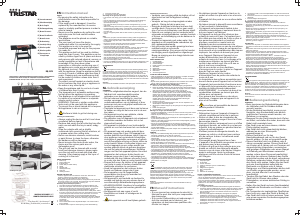
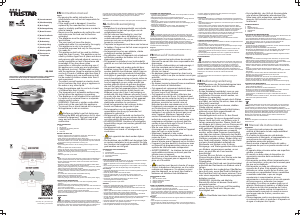
PARTS DESCRIPTION / ONDERDELENBESCHRIJVING / DESCRIPTION DES PIÈCES / TEILEBESCHREIBUNG /
DESCRIPCIÓN DE LAS PIEZAS / DESCRIÇÃO DOS COMPONENTES / DESCRIZIONE DELLE PARTI /
BESKRIVNING AV DELAR / OPIS CZĘŚCI / POPIS SOUČÁSTÍ / POPIS SÚČASTÍ / ПИСАНИЕ ЗАПЧАСТИ
5
4
6
3
1 7 8 9
2
IN NEED OF ACCESSORIES? VISIT
WWW.TRISTAR.EU/ACCESSORIES
2
3
1
4
5
6
7
8
Assembly of the stand
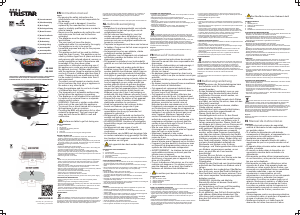
Assembly of the grill
Tristar Europe B.V. | Jules Verneweg 87
5015 BH Tilburg | The Netherlands | www.tristar.eu
ENInstruction manual
SAFETY
• By ignoring the safety instructions the
manufacturer cannot be held responsible for
the damage.
• If the supply cord is damaged, it must be
replaced by the manufacturer, its service
agent or similarly qualified persons in order to
avoid a hazard.
• Never move the appliance by pulling the cord
and make sure the cord cannot become
entangled.
• The appliance must be placed on a stable,
level surface.
• The user must not leave the device
unattended while it is connected to the supply.
• This appliance is only to be used for
household purposes and only for the purpose
it is made for.
• This appliance shall not be used by children
aged less than 8 years. This appliance can be
used by children aged from 8 years and above
and persons with reduced physical, sensory or
mental capabilities or lack of experience and
knowledge if they have been given
supervision or instruction concerning use of
the appliance in a safe way and understand
the hazards involved. Children shall not play
with the appliance. Keep the appliance and its
cord out of reach of children aged less than 8
years. Cleaning and user maintenance shall
not be made by children unless older than 8
and supervised.
• To protect yourself against an electric shock,
do not immerse the cord, plug or appliance in
the water or any other liquid.
• Keep the appliance and its cord out of reach
of children less than 8 years.
• The temperature of accessible surfaces may
be high when the appliance is operating.
• The appliance is not intended to be operated
by means of an external timer or a separate
remote-control system.
• WARNING: Charcoal or similar combustible
fuels must not be used with this appliance.
• To prevent fire or shock hazard do not expose
this appliance to rain or moisture.
• Surface is liable to get hot during use.
Cleaning and maintenance
• Always unplug the device and let it cool down
completely before cleaning
• Remove and empty the fat collecting tray after
each use and wash the tray in warm, soapy
water.
• Wipe the outside with only a slightly
moistened cloth ensuring that no moisture, oil
or grease enters the cooling slots.
• Never use abrasive cleaners, metal brushes
or paint thinner to clean the base, otherwise
the barbecue will be damaged.
• Never immerse the device under water, the
device and the various parts are not
dishwasher-proof.
• The grill rack can be cleaned with a metal
brush and abrasive cleaners, please make
sure the rack will be rinsed and dried after
cleaning. After cleaning apply a thin layer of
cooking oil to the rack.
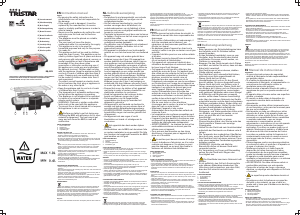
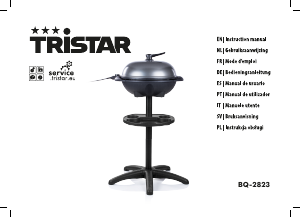
PARTS DESCRIPTION
1. Main body
2. Thermostat knob
3. Indicator light
4. Plastic feet (for table model)
5. Stand
6. Storage rack
7. Water/grease tray
8. Grill rack
9. Heating element
BEFORE THE FIRST USE
• Take the appliance andaccessoriesoutthebox.Removethe
stickers,protective foilorplasticfrom thedevice.
• Clean before usetheappliance with a dampcloth.
• By using the appliance for the first time, the appliance may smell and
emit some smoke. This is normal, the grease that may have adhered
to the element during manufacture is burning off.
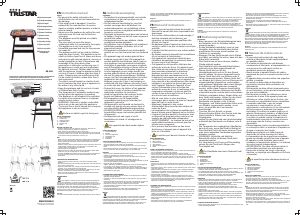
Assembly of the stand (see photo’s)
1. The stand must be assembled before using the barbecue grill.
2. Take the metal poles and insert the long pole into the short pole.
Make sure that the holes of both poles are aligned. The shorter
metal pole should be facing upwards towards the grill unit.
3. Attach the legs (metal poles) of the stand to the metal plates. Place
the holes of the short as well as the long metal plates over the holes
of the metal poles and insert the screw. Attach the nut onto the
screw and slightly fasten it. The long metal plates should be
attached to the front and the short metal plates should be attached
to the sides of the stand. Attach the remaining 3 legs to the stand
accordingly.
4. Fasten the nut.
5. The mounted stand has a trapezoidal shape. The narrow side is
facing upward.
6. Insert the rubber caps into each opening of the assembled leg.
7. Insert the storage rack.
8. The stand is now fully assembled.
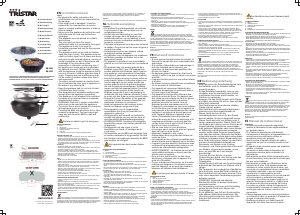
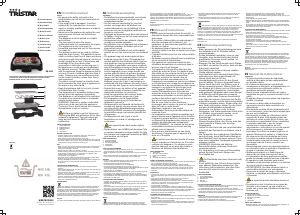
Assembly of the grill (see pictures)
• Fold out the main body (1) as a table and lock it firmly by the metal lock
(2).
• Use the (ST2.9X12) screws (3) to fix the 2 pieces of plastic plates (4).
• Place the plastic plates on the bottom of the main body (1) by 4
(ST2.9X10) screws (5).
• Use one (ST2.9X10) screw (6) to lock the water/grease tray (7) to the
main body.
• Slide the heating element into its position (9). Note: the heating element
is equipped with a safety switch, if the element is not placed in the
correct position the element will not function. Place the grill rack (8) into
the main unit.
• Use the 4 supplied plastic feet for table version or place the grill on the
stand.
USE
• Make sure you place a heat resistance coating under the appliance in
order to prevent traces due to heat and grease stains on your table.
• Fill the grease tray with water, make sure the water level remains below
the element.
• During the use the water will evaporate and should be refilled. Note:
make sure you do not drip water on to the element.
• Insert the mains plug into the wall socket.
• Set the thermostat control knob to the ‘Max.’ position. The indicator light
turns on and the heating element is permanently switched on.
• After approximately 5-10 minutes, the heating element reaches the right
temperature. Turn the thermostat control knob back to a lower position
and/or adjust the grill rack to the middle or upper position.
• The appliance can also be used to keep food warm; turn the thermostat
control knob to a low position, the heating element will be switched on
and off alternatively to keep the food warm.
• After using the appliance, turn the thermostat to “MIN” and disconnect
from the mains supply socket.
• Covering the BBQ with aluminium foil or other material is dangerous! The
heat cannot get away and will cause the BBQ to melt and malfunction.
ENVIRONMENT
This appliance should not be put into the domestic garbage at the
end of its durability, but must be offered at a central point for the recycling
of electric and electronic domestic appliances. This symbol on the
appliance, instruction manual and packaging puts your attention to this
important issue. The materials used in this appliance can be recycled. By
recycling of used domestic appliances you contribute an important push to
the protection of our environment. Ask your local authorities for information
regarding the point of recollection.
Support
You can find all available information and spare parts at www.tristar.eu!
NLGebruiksaanwijzing
VEILIGHEID
• Als u de veiligheidsinstructies negeert, kan de
fabrikant niet verantwoordelijk worden
gehouden voor de mogelijke schade.
• Als het netsnoer beschadigd is, moet het
worden vervangen door de fabrikant, de
onderhoudsmonteur van de fabrikant of door
personen met een soortgelijke kwalificatie om
gevaar te voorkomen.
• Verplaats het apparaat nooit door aan het snoer
te trekken en zorg dat het snoer niet in de war
kan raken.
• Het apparaat moet op een stabiele, vlakke
ondergrond worden geplaatst.
• De gebruiker mag het apparaat niet onbeheerd
achterlaten wanneer de stekker zich in het
stopcontact bevindt.
• Dit apparaat is uitsluitend voor huishoudelijk
gebruik en voor het doel waar het voor bestemd
is.
• Dit apparaat mag niet worden gebruikt door
kinderen jonger dan 8 jaar. Dit apparaat kan
worden gebruikt door kinderen vanaf 8 jaar en
door personen met verminderde lichamelijke,
zintuiglijke of geestelijke vermogens of gebrek
aan de benodigde ervaring en kennis indien ze
onder toezicht staan of instructies krijgen over
hoe het apparaat op een veilige manier kan
worden gebruikt alsook de gevaren begrijpen
die met het gebruik samenhangen. Kinderen
mogen niet met het apparaat spelen. Houd het
apparaat en het netsnoer buiten bereik van
kinderen jonger dan 8 jaar. Laat reiniging en
onderhoud niet door kinderen uitvoeren, tenzij
ze ouder zijn dan 8 jaar en onder toezicht staan.
• Dompel het snoer, de stekker of het apparaat
niet onder in water of andere vloeistoffen om
elektrische schokken te voorkomen.
• Houd het apparaat en het netsnoer buiten
bereik van kinderen jonger dan 8 jaar.
• De temperatuur van de toegankelijke
oppervlakken kan hoog zijn wanneer het
apparaat in gebruik is.
• Het apparaat is niet bedoeld om bediend te
worden met behulp van een externe timer of
een afzonderlijk afstandbedieningssysteem.
• WAARSCHUWING: Houtskool of soortgelijke
brandstoffen mogen niet worden gebruikt met
dit apparaat.
• Het apparaat niet aan regen of vocht
blootstellen om brand- of schokgevaar te
voorkomen.
• Het oppervlak wordt heet tijdens gebruik.
Cleaning and maintenance
• Verwijder voor reiniging altijd de stekker uit het
stopcontact en laat het apparaat volledig
afkoelen.
• Verwijder en leeg de vetopvangbak na ieder
gebruik . Reinig de bak in warm sop.
• Reinig de buitenkant uitsluitend met een licht
vochtige doek. Zorg ervoor dat er geen vocht,
olie of vet via de koelspleten naar binnen sijpelt.
• Gebruik voor reiniging van het onderstel nooit
schurende reinigingsmiddelen, metalen borstels
of thinner om beschadiging van de barbecue te
voorkomen.
• Dompel het apparaat nooit onder water. Het
apparaat en de verschillende onderdelen zijn
niet vaatwasserbestendig.
• Het grillrooster kan worden gereinigd met een
metalen borstel en schurende
reinigingsmiddelen. Zorg ervoor dat het rooster
na reiniging wordt afgespoeld en afgedroogd.
Breng na reiniging een dun laagje bakolie aan
op het rooster.
PARTS DESCRIPTION
1. Hoofdgedeelte
2. Thermostaatknop
3. Indicatorlampje
4. Plastic voetjes (voor tafelmodel)
5. Standaard
6. Opbergrek
7. Water-/vetopvangbak
8. Grillrooster
9. Verwarmingselement
VOOR HET EERSTE GEBRUIK
• Haal het apparaat en de accessoires uit de doos.Verwijder de stickers,
de beschermfolie of het plastic van het apparaat.
• Maak het apparaat voor het eerste gebruik schoon met een vochtige
doek
• Bij het eerste gebruik kunnen geurtjes en rook ontstaan. Dit is normaal,
het zijn resten van oliën die bij fabricage niet verwijderd zijn.
Montage van de standaard (zie afbeedlingen)
1. Monteer de standaard voordat u de barbecuegrill gaat gebruiken.
2. Neem de metalen stokken en doe de lange stok in de korte stok. Zorg
ervoor dat de gaten van beide stokken zijn uitgelijnd. De korte metalen
stok moet omhoog gericht zijn, in de richting van de grill.
3. Bevestig de poten (metalen stokken) van de standaard aan de
metalen platen. Plaats de gaten van de korte en de lange metalen
platen boven de gaten van de metalen stokken en bevestig de
schroef. Doe de moer op de schroef en draai deze stevig vast.
Bevestig de lange metalen platen aan de voorzijde en de korte
metalen platen aan de zijkant van de standaard. Bevestig de
resterende 3 poten ook aan de standaard.
4. Draai de moer vast.
5. De gemonteerde standaard heeft de vorm van een trapezium. De
smalle zijde is naar boven gericht.
6. Bevestig de rubberen kapjes op de openingen van alle gemonteerde
poten.
7. Plaats het opbergrek.
8. De standaard is nu volledig gemonteerd.
Montage van de grill (zie afbeeldingen)
• Vouw het hoofdgedeelte (1) uit als een tafel en zet het stevig vast met de
metalen vergrendeling (2).
• Gebruik de (ST2.9X12)-schroeven (3) om de 2 plastic platen vast te
zetten (4).
• Plaats de plastic platen op de onderzijde van het hoofdgedeelte (1) met
4 (ST2.9X10)-schroeven (5).
• Gebruik 1 (ST2.9X10)-schroef (6) om de water-/vetopvangbak (7) vast te
zetten op het hoofdgedeelte.
• Schuif het verwarmingselement op zijn plek (9). Opmerking: Het
verwarmingselement is voorzien van een veiligheidsschakelaar. Als het
element niet correct is geplaatst, werkt het niet. Plaats het grillrooster (8)
op het hoofdgedeelte.
• Gebruik de 4 meegeleverde plastic voetjes voor het tafelmodel, of plaats
de grill op de standaard.
GEBRUIK
• Zorg voor een hittebestendige laag onder het apparaat om sporen door
warmte en vetvlekken op uw tafel te voorkomen.
• Vul de lekbak met water. Zorg ervoor dat het waterniveau onder het
element blijft.
• Tijdens gebruik zal het water verdampen en moet het worden bijgevuld.
Let op: Zorg ervoor dat er geen water op het element druppelt.
• Plaats de netstekker in het stopcontact.
• Stel de thermostaatknop in op de maximale stand. Het indicatorlampje
gaat branden. Het verwarmingselement blijft ingeschakeld.
• Na circa 5-10minuten bereikt het verwarmingselement de juiste
temperatuur. Draai de thermostaatknop terug naar een lagere stand en/
of zet het grillrooster in de middelste of bovenste positie.
• Het apparaat kan ook worden gebruikt om eten warm te houden: Draai
de thermostaatknop naar een lage stand. Het verwarmingselement wordt
afwisselend in- en uitgeschakeld om het eten warm te houden.
• Nadat u het apparaat hebt gebruikt, draait u de thermostaat naar de
minimale stand en haalt u de stekker uit het stopcontact.
• Het bedekken van de BBQ met aluminium folie en andere materialen is
erg gevaarlijk! De hitte kan hierdoor niet wegkomen waardoor de BBQ
gaat smelten en stuk gaat.
MILIEU
Dit apparaat mag aan het einde van de levensduur niet bij het
normale huisafval worden gedeponeerd, maar moet bij een speciaal
inzamelpunt voor hergebruik van elektrische en elektronische apparaten
worden aangeboden. Het symbool op het apparaat, in de
gebruiksaanwijzing en op de verpakking attendeert u hierop. De in het
apparaat gebruikte materialen kunnen worden gerecycled. Met het
recyclen van gebruikte huishoudelijke apparaten levert u een belangrijke
bijdrage aan de bescherming van ons milieu. Informeer bij uw lokale
overheid naar het inzamelpunt.
Support
U kunt alle beschikbare informatie en reserveonderdelen vinden op
www.tristar.eu!
FRManuel d'instructions
SÉCURITÉ
• Si vous ignorez les consignes de sécurité, le
fabricant ne peut être tenu pour responsable
des dommages.
• Si le cordon d'alimentation est endommagé, il
doit être remplacé par le fabricant, son
réparateur ou des personnes qualifiées afin
d'éviter tout risque.
• Ne déplacez jamais l'appareil en tirant sur le
cordon et veillez à ce que celui-ci ne s'enroule
pas.
• L'appareil doit être posé sur une surface stable
et nivelée.
• Ne laissez jamais le dispositif sans surveillance
s'il est connecté à l'alimentation.
• Cet appareil est uniquement destiné à des
utilisations domestiques et seulement dans le
but pour lequel il est fabriqué.
• Cet appareil ne doit pas être utilisé par des
enfants de moins de 8 ans. Cet appareil peut
être utilisé par des enfants de 8 ans ou plus et
des personnes présentant un handicap
physique, sensoriel ou mental voire ne
disposant pas des connaissances et de
l'expérience nécessaires en cas de surveillance
ou d'instructions sur l'usage de cet appareil en
toute sécurité et de compréhension des risques
impliqués. Les enfants ne doivent pas jouer
avec l'appareil. Maintenez l'appareil et son
cordon d'alimentation hors de portée des
enfants de moins de 8 ans. Le nettoyage et la
maintenance utilisateur ne doivent pas être
confiés à des enfants sauf s'ils ont 8 ans ou
plus et sont sous surveillance.
• Afin de vous éviter un choc électrique,
n'immergez pas le cordon, la prise ou l'appareil
dans de l'eau ou autre liquide.
• Maintenez l'appareil et son cordon
d'alimentation hors de portée des enfants de
moins de 8 ans.
• La température des surfaces accessibles peut
devenir élevée quand l'appareil est en fonction.
• L'appareil n'est pas destiné à fonctionner avec
un dispositif de programmation externe ou un
système de télécommande indépendant.
• AVERTISSEMENT: Le charbon de bois et les
combustibles similaires ne doivent pas être
utilisés avec cet appareil.
• Pour prévenir des incendies ou des chocs
électriques, n'exposez pas cet appareil à la
pluie ou à l'humidité.
• La surface est susceptible de devenir
chaude pendant l'utilisation.
Cleaning and maintenance
• Débranchez toujours l’appareil et laissez-le
refroidir complètement avant de le nettoyer.
• Retirez et videz le bac de récupération de
graisse après chaque usage et lavez-le à l'eau
savonneuse chaude.
• Essuyez l'extérieur uniquement avec un chiffon
légèrement humide, en veillant à ce qu'aucune
humidité, huile ou graisse ne pénètre dans les
orifices de refroidissement.
• N'utilisez jamais de détergents abrasifs, de
brosses en métal ou de diluant pour peinture
afin de nettoyer la base. Le barbecue serait
endommagé.
• N’immergez jamais l’appareil sous l’eau.
L’appareil et les différents accessoires ne sont
pas prévus pour le lave-vaisselle.
• L'étagère de grill peut être nettoyée avec une
brosse en métal et des détergents abrasifs.
Assurez-vous de rincer et de sécher l'étagère
après le nettoyage. Après le nettoyage,
appliquez une fine couche d'huile de cuisson
sur l'étagère.
PARTS DESCRIPTION
1. Corps principal
2. Thermostat
3. Témoin lumineux
4. Pieds en plastique (pour le modèle table)
5. Support
6. Étagère de rangement
7. Bac à eau/graisse
8. Grille
9. Élément de chauffage
AVANT LA PREMIÈRE UTILISATION
• Retirer l’appareil et les accessoires du carton. Retirer les autocollants, le
film ou le plastique protecteur de l’appareil.
• Avant l’utilisation, nettoyez l’appareil avec un chiffon humide.
• Lors de la première utilisation de l’appareil, l’appareil peut dégager une
légère odeur et de la fumée. Ceci est normal, il se peut qu’un enduit
graisseux se soit collé à la résistance lors de la fabrication et qu’il se
consume.
Assemblage du support
1. Le support doit être assemblé avant d'utiliser la grille du barbecue.
2. Prenez les piquets métalliques et insérez le piquet long dans le piquet
court. Veillez à ce que les trous des deux piquets soient alignés. Le
piquet métallique le plus court doit être orienté vers le haut en
direction du gril.
3. Fixez les pieds (piquets métalliques) du support aux plaques
métalliques. Placez les trous des plaques métalliques courtes et
longues sur les trous des piquets métalliques et insérez la vis. Fixez
l'écrou sur la vis et serrez légèrement. Les longues plaques
métalliques doivent être fixées à l'avant et les courtes plaques
métalliques doivent être fixées sur les côtés du support. Fixez les 3
autres pieds au support en conséquence.
4. Fixez l'écrou.
5. Le support monté a une forme trapézoïdale. Le côté étroit est tourné
vers le haut.
6. Insérez les bouchons en caoutchouc dans chaque ouverture du pied
assemblé.
7. Insérez l'étagère de rangement.
8. Le support est maintenant entièrement assemblé.
Assemblage des plaques de gril (voir illustrations)
• Déployez le corps principal (1) comme une table et verrouillez-le
fermement avec la serrure métallique (2).
• Utilisez les vis (ST2.9X12) (3) pour fixer les 2 éléments de plaques en
plastique (4).
• Placez les plaques en plastique sur le fond du corps principal (1) au
moyen de 4 vis (5) (ST2.9X10).
• Utilisez une vis (ST2.9X10) (6) pour fixer le bac à eau/graisse (7) au
corps principal.
• Faites glisser l'élément de chauffage dans sa position (9). Remarque:
l'élément de chauffage est équipé d'un interrupteur de sécurité, si
l'élément n'est pas placé dans la position correcte, il ne fonctionnera pas.
Placez la grille (8) sur l'unité principale.
• Utilisez les 4 pieds en plastique fournis pour la version de table ou
placez le gril sur le support.
UTILISATION
• Assurez-vous de placer un revêtement thermorésistant sous l'appareil
pour éviter les traces dues à la chaleur et les taches de graisse sur votre
table.
• Remplissez d'eau le bac à graisse en vous assurant que le niveau d'eau
reste sous l'élément.
• Durant l'usage, l'eau s'évapore et doit être réapprovisionnée. Note :
assurez-vous de ne pas laisser tomber de gouttes d'eau sur l'élément.
• Insérez la fiche secteur dans la prise murale.
• Réglez le thermostat sur la position «Max.». Le témoin lumineux
s'allume et l'élément de chauffage est allumé en permanence.
• Après environ 5 à 10 minutes, l'élément de chauffage atteint la bonne
température. Remettez le bouton de commande du thermostat en
position basse et/ou réglez la grille en position moyenne ou haute.
• L'appareil peut également être utilisé pour maintenir les aliments au
chaud; tournez le bouton de commande du thermostat en position
basse, l'élément de chauffage sera alternativement allumé et éteint pour
maintenir les aliments au chaud.
• Après avoir utilisé l'appareil, mettez le thermostat sur «MIN» et
débranchez-le de la prise de courant.
• Couvrir le barbecue d’aluminium ou d’un autre matériau est dangereux !
La chaleur ne peut pas être dégagée, ce qui peut faire fondre le
barbecue ou entraîner des défaillances.
ENVIRONNEMENT
Cet appareil ne doit pas être jeté avec les déchets ménagers à la
fin de sa durée de vie, il doit être remis à un centre de recyclage pour les
appareils électriques et électroniques. Ce symbole sur l'appareil, le
manuel d'utilisation et l'emballage attire votre attention sur un point
important. Les matériaux utilisés dans cet appareil sont recyclables. En
recyclant vos appareils, vous contribuez de manière significative à la
protection de notre environnement. Renseignez-vous auprès des autorités
locales pour connaître les centres de collecte des déchets.
Support
Vous retrouvez toutes les informations et pièces de rechange sur
www.tristar.eu!
DEBedienungsanleitung
SICHERHEIT
• Beim Ignorieren der Sicherheitshinweise kann
der Hersteller nicht für Schäden haftbar
gemacht werden.
• Ist das Netzkabel beschädigt, muss es vom
Hersteller, dem Kundendienst oder ähnlich
qualifizierten Personen ersetzt werden, um
Gefahren zu vermeiden.
• Bewegen Sie das Gerät niemals durch Ziehen
am Kabel, und stellen Sie sicher, dass sich das
Kabel nicht verwickeln kann.
• Das Gerät muss auf einer ebenen, stabilen
Fläche platziert werden.
• Das Gerät darf nicht unbeaufsichtigt bleiben,
während es an einer Stromquelle
angeschlossen ist.
• Dieses Gerät darf nur für den
Haushaltsgebrauch und nur für den Zweck
benutzt werden, für den es hergestellt wurde.
• Dieses Gerät darf nicht von Kindern unter 8
Jahren verwendet werden. Dieses Gerät darf
von Kindern ab 8 Jahren und von Personen mit
eingeschränkten körperlichen, sensorischen
oder geistigen Fähigkeiten oder einem Mangel
an Erfahrung und Kenntnissen verwendet
werden, sofern diese Personen beaufsichtigt
oder über den sicheren Gebrauch des Geräts
unterrichtet wurden und die damit verbundenen
Gefahren verstanden haben. Kinder dürfen mit
dem Gerät nicht spielen. Halten Sie das Gerät
und sein Anschlusskabel außerhalb der
Reichweite von Kindern unter 8 Jahren.
Reinigungs- und Wartungsarbeiten dürfen nicht
von Kindern vorgenommen werden, es sei
denn, sie sind älter als 8 und werden
beaufsichtigt.
• Tauchen Sie das Kabel, den Stecker oder das
Gerät nicht in Wasser oder andere
Flüssigkeiten, um einen elektrischen Schlag zu
vermeiden.
• Halten Sie das Gerät und sein Anschlusskabel
außerhalb der Reichweite von Kindern unter 8
Jahren.
• Die Temperatur der zugänglichen Oberflächen
kann hoch sein, wenn das Gerät in Betrieb ist.
• Das Gerät darf nicht mit einem externen Timer
oder einem separaten Fernbedienungssystem
betrieben werden.



Dołącz do dyskusji na temat tego produktu
Tutaj możesz podzielić się swoją opinią na temat Tristar BQ-2870 Grill. Jeśli masz pytanie, najpierw dokładnie przeczytaj instrukcję. Zapytanie o instrukcję można złożyć za pomocą naszego formularza kontaktowego.